
I was so bored at home so I end up finishing this tutorial.
It is the Black ink concept. Wherein an ordinary portrait photo turns into an
old and inked-type sketch or painted in a old paper. Let’s start with. Here were
the materials we need.>>>>>
*credits: Photos are from their respective owners. SO DON'T SUE ME.
<<<<<
-denztriker

Crystal Liu Portrait

Brush

Old paper texture
Open the image of the model in Photoshop.

Duplicate the layer and go to Filter>>>
Artistic>>> Colored Pencil. Set the Pencil width to 24; Stroke
Pressure: 4; Paper Brightness: 50;

Darken the duplicated layer. Go to Image>>>
Adjustments>>> Curves. Set the Output: 122; Input: 154;

Then open and insert the old paper texture.

Resize it and almost the size of the canvas.

Then set the old paper texture layer under the layer with
colored pencil effect. Set the layer blending mode of the duplicated layer to
Multiply.

After that, go to Image>>> Adjustments>>>
Black and White. Set the Preset to Maximum Black.

Result after the Black and White effect.

Then open and insert the brush image above the all layers.
Resize it and arrange as you desires. Like I did below.
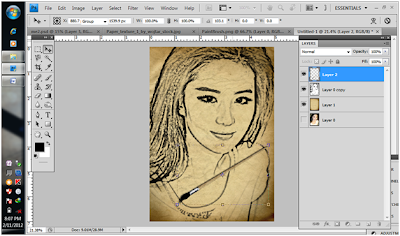
Then I add some text (the name of the model). And here is
the result of this tutorial.
Me:


0 (mga) komento:
Post a Comment