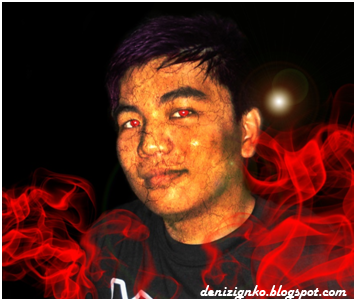
Hi everyone! Today I am going to show
you on how to add texture to the skin like the image below.

First, we need these materials for
this tutorial:
Rock Surface
Image
For
this material, you can search for alternatives in Google Images or in any
search engines. So let’s start this tutorial by opening the image.
And
then open the stone texture image.
After
that, copy the whole image of the stone texture by using Rectangular Marquee
Tool to select, then hit CTRL+C to copy.
Then
paste it on our first image that we used. Resize the pasted stone texture image
by holding Shift key and dragging like this one.
Reduce
the opacity of the Stone texture image into 50% and let it fits the First image
all over the face and also covered the neck.
Make
sure you selected the Stone texture image layer then go to
EDIT>>>TRANSFORM>>>WARP.
Let’s
try to transform the Stone image just like below.
Then
press Enter key. After that, change the opacity into 100% then change the layer
from NORMAL to COLOR DODGE, see the image below.
Duplicate
the Stone layer.
Then
adjust the Opacity of the duplicated layer into 50% and change COLOR DODGE to
OVERLAY.
The
next step is to delete the unnecessary edge that covers the shoulder part, not
in the neck part. Then do it to the other stone layer. Use the Eraser tool (E)
for erasing and Zoom tool (Z) for zooming in and out. Here is a closer look of
the image.
Duplicate
our first image layer (the face one) and select the Burn tool or just press O.
Burn the face by using the tool, just click and drag. Be careful; do not burn
the clothing or the hair, just burn the face, like this one below.
After
that, create a new layer above it; paint the eye with red by using the brush,
and changing the Layer form NORMAL to LINEAR DODGE (ADD). It looks like this
image below:
And
we are done! You just some stuff you want to add in the canvas. I just put some
sort of lights and other materials. Just play around with it. Thanks for
visiting, hope it helps!
Output:
I
added some stuffs like red smoke and lightings =)


0 (mga) komento:
Post a Comment