Tuesday, July 10, 2012
Sunday, June 3, 2012
Saturday, June 2, 2012
Sunday, May 13, 2012
Denizignko's Secret Files: Sample House Plan (Google SketchUp Pro 8))
Google SketchUp Pro is 3D modeling software for professionals. SketchUp is easy and
intuitive, allowing anyone to model in 3D quickly and accurately. Using 3D models,
designers can make more informed decisions, communicate project details, and share ideas
with colleagues and customers to reach a common goal. (From Google).
So I tried to used it because I want to try it and I want to design a building or a house. Here is my example of a simple bungalow house created and designed in Google SketchUp Pro 8. Here are some screenshots:
Sunday, May 6, 2012
Thursday, May 3, 2012
Wednesday, May 2, 2012
CorelDRAW Tutorials - Omnitrix of Ben10
The Omnitrix (a combination of the Latin words omni- and trix, literally
meaning "many forms") is portrayed as a small alien device that
attaches to the wrist of the user like a watch.(Read more on ben10versepedia)
And let's start the tutorial! Open CorelDRAW...
CorelDRAW Tutorials - Bloo of Foster's Home for Imaginary Friends
Foster's Home for Imaginary Friends is an American animated television series created and produced at Cartoon Network Studios by animator Craig McCracken, creator of The Powerpuff Girls.
First, who is Bloo?
Bloo – Mac's 5-year-old imaginary friend and best friend who
resembles a simple, domed cylinder. Bloo is sometimes self-centered,
egotistic, and narcissistic, and has a knack for getting in trouble.
However, he still has a good heart and apologizes for his actions. (http://en.wikipedia.org)
Okay, let's start the tutorial....
Tuesday, May 1, 2012
Saturday, April 28, 2012
Thursday, April 26, 2012
CorelDRAW Tutorials - How to draw a pair of eyes of an Anime character
I am a fan of Anime. So I tried to look for Manga EX Studio to draw an Anime Character using that software, but unfortunately, I don't have the software, but I have CorelDRAW X5 to use. This was the first time that I will post a tutorial for using CorelDRAW. Hope you guys can follow these steps. And for our first mission is to draw a pair of eyes of an Anime character. SO let's start the tutorial !!!
Friday, March 30, 2012
Wednesday, March 28, 2012
Adobe Photoshop Tutorials - Lee Kyeong Min - Pop Art Poster
A pop art poster tutorial for you guys… when I went to a
mall, I saw a pop art poster of a model hanging on a wall. Thanks for the
concept, and I made my own tutorial. We have to use any portrait images, I will
be using image of Ms. Lee Kyeong Min, I don’t own the image, so don’t sue me. I
just searched it on Mr. Google.
Let’s start, open the image on Photoshop.
Friday, March 16, 2012
Sunday, March 11, 2012
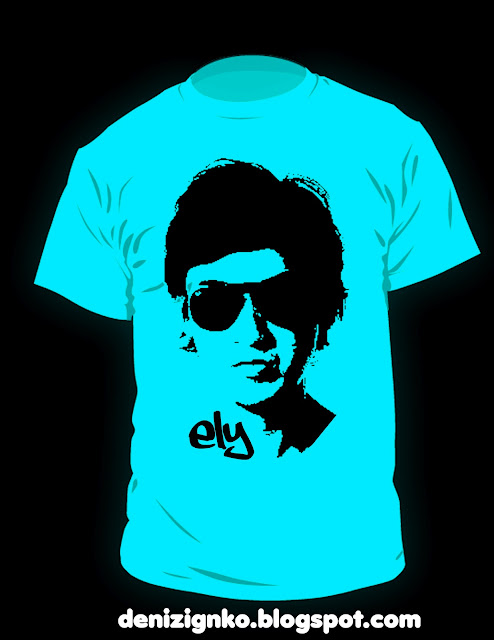
Adobe Photoshop Tutorials - Ely Buendia Tshirt - Fan Made

In order to produce this design, let's have a model. Our model is the famous and one of the best OPM musician and former Lead Vocalist of ERASERHEADS, here in Philippines. He is Ely Buendia...
Thursday, March 8, 2012
Adobe Photoshop - Digital Poster-making Contest 2012

Here are the winners in 3rd ICT Mini-Congress 2012 - DIGITAL POSTER MAKING CONTEST held at University Of Luzon College of Computer Studies, on the 8th day of March, 2012. 7 entries, limited time, 1 Champion!
Saturday, February 25, 2012
Adobe Photoshop Tutorials - Pop Singer Poster
In this tutorial we are going to create a Pop Singer Poster
using some colors and shapes like circles. For this particular tutorial, we are
going to use two images as a material. First we need a model; we are going to
use the image of Ms. Goo Hara, a famous actress in South Korea. Here are the
materials we need:>>>>> *credits: Photos are from their respective owners. SO DON'T SUE ME. <<<<< -denztriker
Wednesday, February 22, 2012
Adobe Photoshop Tutorials - Killer Apple Tutorial
This tutorial was started because of i bite an apple and the
bitten part of the apple was like a mouth of a tiger, so I decided to do a
simple tutorial in Photoshop on how to create an apple with a mouth of a tiger.
And I called this tutorial as the “Killer Apple Tutorial”, so let’s start with
these materials:>>>>> *credits: Photos are from their respective owners. SO DON'T SUE ME. <<<<< -denztriker
Tuesday, February 14, 2012
Adobe Photoshop Tutorials - Black Ink Effect
I was so bored at home so I end up finishing this tutorial.
It is the Black ink concept. Wherein an ordinary portrait photo turns into an
old and inked-type sketch or painted in a old paper. Let’s start with. Here were
the materials we need.>>>>>
*credits: Photos are from their respective owners. SO DON'T SUE ME.
<<<<<
-denztriker
Monday, February 6, 2012
Sunday, February 5, 2012
Friday, February 3, 2012
Thursday, February 2, 2012
Wednesday, February 1, 2012
Tuesday, January 31, 2012
Monday, January 30, 2012
Adobe Photoshop Tutorials - Multi-colored Plastic-like Hair Tutorial
In this tutorial, I am going to show you on how to put some colors in the hair in order to have a multi-colored plastic-like hair. And I am going to put some shades and shine to the hair.
Let’s begin! First you need a picture of a woman with a long hair, or any woman with a natural hair. Just search I Google and you will find many images that you can used. Then let’s open it on Photoshop.>>>>>
*credits: Photos are from their respective owners. SO DON'T SUE ME.
<<<<<
-denztriker
Sunday, January 29, 2012
Sunday, January 22, 2012
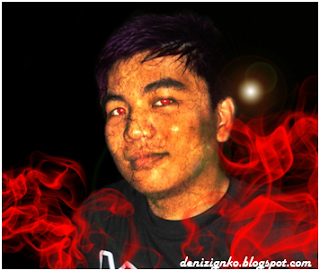
Adobe Photoshop Tutorials - Adding Some Textures to the Skin
Hi everyone! Today I am going to show
you on how to add texture to the skin like the image below.

Adobe Photoshop Tutorials - How To Create a Mental Sphere with a Background
For this tutorial,(For
the first time, I am not using my personal picture as a model! haha) I will
show you on how to create mental sphere and get realistic reflection from
environment to this sphere.
>>>>> *credits: Photos are from their respective owners. SO DON'T SUE ME. <<<<< -denztriker
>>>>> *credits: Photos are from their respective owners. SO DON'T SUE ME. <<<<< -denztriker
Materials needed:
Mountain photo
Fairy Photo
Now let’s start!
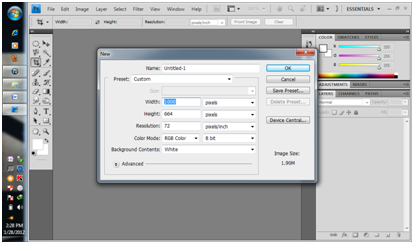
Open Photoshop. Then
create a preset with width to 1000px and height to 664px.
Then Copy the
Mountain Photo located in this site then pasted it on the new canvas you
created. Resize it to fit in.
Then open the
Fairy photo in Photoshop. Copy the whole image then paste in on the Mountain
Photo. Resize the Fairy photo. Just like the image shown below.
Then use Magic
Wand Tool with a Tolerance of 29% then select the background of the Fairy tool.
After selecting the main background, press Delete.
Remove selection
with Select > Deselect, then correct brightness and contrast with Image >
Adjustments > Brightness/Contrast: Brightness: 11 Contrast: -25.
Select background
layer, the Mountain photo layer. Make round selection with Elliptical Marquee
Tool on it. Like this one:
Press Ctrl+J to
duplicate selected area to new layer. Select content layer by pressing Ctrl and
clicking on thumbnail layer on layers. Then Load the sphere selection by going
to Select >>> Load Selection.
Then apply Filter >>> Distort
>>> Spherize.
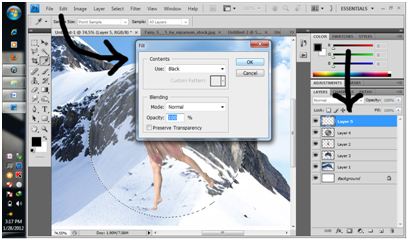
With selection
still active, create new layer above all layers and fill it with black color.
Apply Filter
>>> Render >>> Clouds to this layer.
Apply Filter
>>> Distort >>> Spherize.
Change layer mode
to Screen and lower opacity to 50%
With selection
still active, create new layer above all layers and fill it with black color.
Deselect area with
Ctrl+D an update layer opacity to 0%. After that go to Layer >>> Layer
Style >>> Inner Glow and apply style with following settings:
And here is our
final result. Don’t forget to save your work as PSD then create a backup.
I hope you like
it.


