Materials Needed:
Corel Draw X3 or Higher
Difficulty:
Easy/Moderate
In this tutorial, I am going to show you on how to create a simple logo for a company, specifically on a photography studio. Below is an example of a creative brief coming from our client.
Creative Brief:
Company Name: Pic Studio
Industry: Photography
Logo Styles: Camera + Company Name + Company Colors
Other Info: Our Company Colors are Cyan and White. It should have a graphic element/s that we can also use as an application logo for mobile app. The logo should have the company name in any place of the logo. Choose the best font and make it simple but attractive.
Simple Logo Tutorial
Our final result would be like this.

Let's Start!!!
Open a new document. Any size of the paper will do.
Then Select on VIEW and choose ENHANCED.
Also check for the SNAP TO OBJECTS if it is enabled. If not, key in ALT Z in your keyboard.
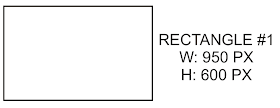
Create a rectangle,(F6 for shortcut of rectangle) with these sizes indicated below and outline size.

Then go to WINDOW (located in the menu bar), select on DOCKERS, and choose FILLET/SCALLOP/CHAMFER.
With the rectangle selected, and in the FILLET DOCKER, select FILLET for the OPERATION, and 50 px for the RADIUS and clikc on APPLY.
Next remove the outline of the rectangle and apply CYAN color to it.
Next create a circle (Ellipse Tool, F7) with the following properties.
Then remove the outline, and apply WHITE color for it.
Create a new circle and apply these properties.
Then move it to the center of the while circle, as shown in the image below.
Create a new circle, with these properties.
Then move it to the upper left corner of the rectangle, and remove the outline.
Next, create a new rectangle with these properties.
Locate the center of the rectangle#2 and place it it the above midpoint of our rectangle#1.
Here is the result.
Create a new rectangle with these properties.
Relocate the rectangle#3 in the upper right corner of rectangle#1, then remove the outline.
Next, create our last rectangle. Properties are shown below.
Then, locate the center of the rectangle#4, then move it near to the upper side of the rectangle #1.
Here is the result. We are done with the graphic.
Next is the compnay name. Insert a text "Studio" with these properties.
Create another text, name it as "pic". Apply the properties indicated below.
Then arrange the two texts. Put the "pic" text above the "Studio" text. and Select the two text and hit CTRL G to group. Move the text above our graphic logo.
Then we are done with our logo. Save your file as CDR (Corel Draw Format) and a Image File (JPG or PNG Format) for viewing. Here is our final output for this tutorial.
I created an alternate version above. Here is it.
Leave your comment or suggestions.


No comments:
Post a Comment